Instructions for logging in and using Windows VPS
Windows VPS provides us with a friendly interface. The variety in functions as a computer made it a choice. However, how to log in to the Windows VPS on the computer? How to use it on your computer? Daintycloud will help you answer in this article.
Things to prepare to login Windows VPS
To start this tutorial process, we need to prepare some of the following:
- Windows VPS virtual server (if you don’t have one yet, visit Daintycloud.com to rent a VPS that suits your needs).
- Check VPS information: IP Address, Username, Password.
- The computer runs the Windows operating system.
Steps to perform Windows VPS log in
Step 1: Open the Remote Desktop Connection application
Click Start (Windows), type “Remote Desktop Connection” in, open the “Remote Desktop Connection” application, a dialog box appears as follows:
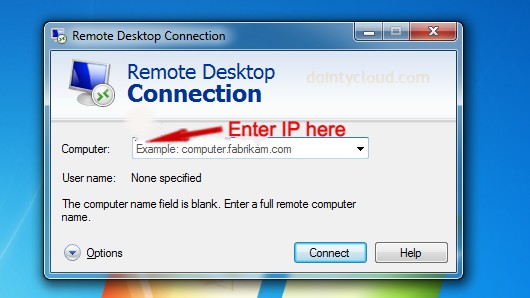
Please enter the IP of the VPS in the Computer box and then click Connect.
Step 2: Enter IP, Username, Password into Remote Desktop Connection application
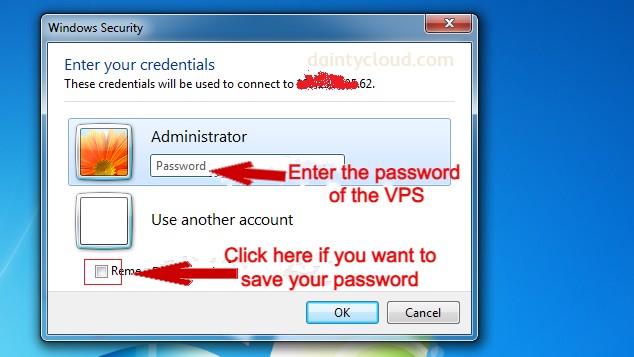
Enter the password of the VPS – select the Option “Remember my credentials” if you want to save the password so that later when you log in to the VPS, you do not need to re-type the password.
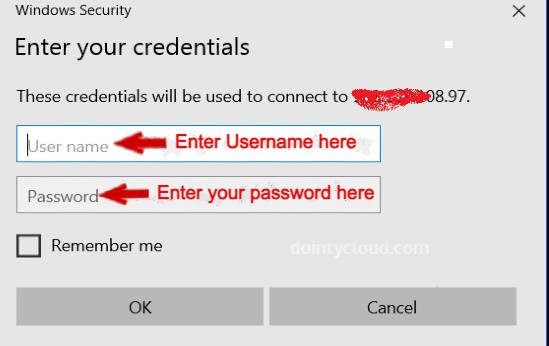
After you have entered the password and continue to click => OK.
Step 3: Confirm security to login to VPS
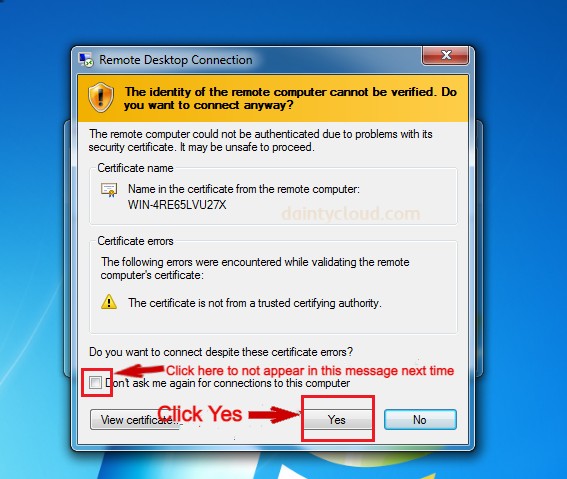
A new dialog box will ask you to confirm the security. You should check the box “Don’t ask me…” and then select => Yes.
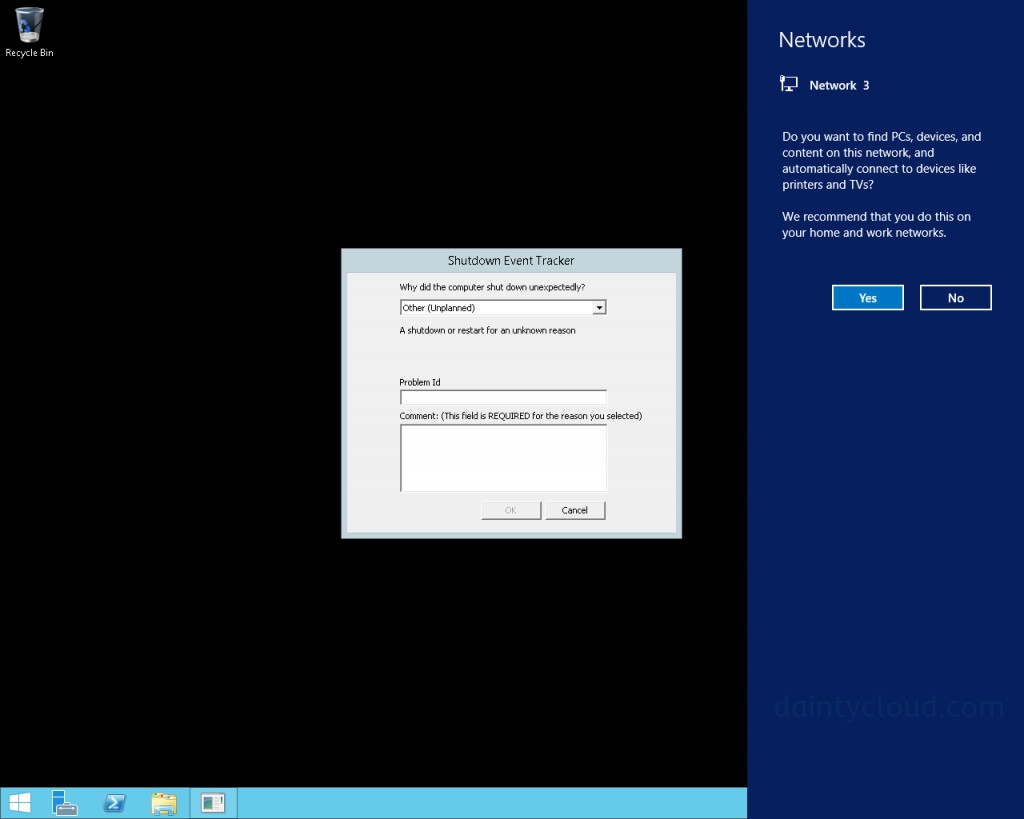
After successful login, the VPS interface will be as shown below. And it is ready to use. Here you can use it as a computer.
After successfully logging in, you should change your password to best secure your VPS service.
At Daintycloud, we specialize in providing services: Cloud VPS, Windows VPS, VPS Android Emulator, GPU Server with big partners like WebMoney, Paypal,… Any suggestions, please send them to Daintycloud’s contact channels. Our team is ready to answer all your questions 24/7. Thanks for following this post!


