


Change Hostname on Windows VPS with just three easy steps
In some cases, you will need to change the hostname on the Windows VPS to facilitate the operating environment. So what is a hostname? How to change it? Dainty Cloud will help you answer in the article below.
What is a hostname?
The hostname is the name used to identify the host address on the network. In simpler terms, it is a set of characters representing the server. It is what distinguishes one device from another on the Internet. And as long as there is an internet connection, any device can be selected as a host. Like a personal computer or a mobile phone can be a host.

DNS servers also use hostnames. You can visit the website with an easy-to-remember name. Be aware that the hostname will not contain spaces. Hostname sorted by alphabetical or numerical order. And the hyphen is the only symbol allowed when naming hostnames.
Instructions to change the hostname on Windows VPS
Step 1. Press the “Windows + R” key combination to open the Run dialog box. Then enter “sysdm.cpl”.
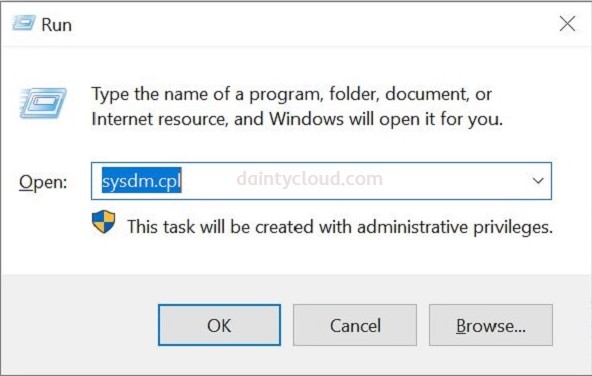
Step 2. Click “OK” and the next dialog box will appear as shown below.
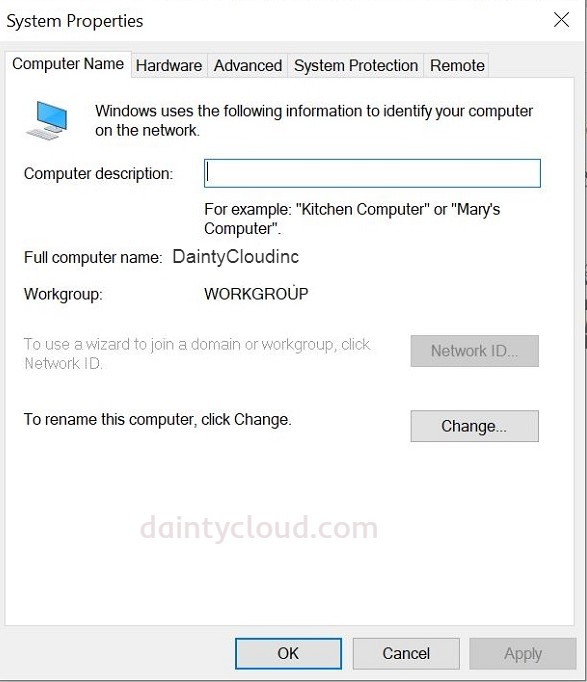
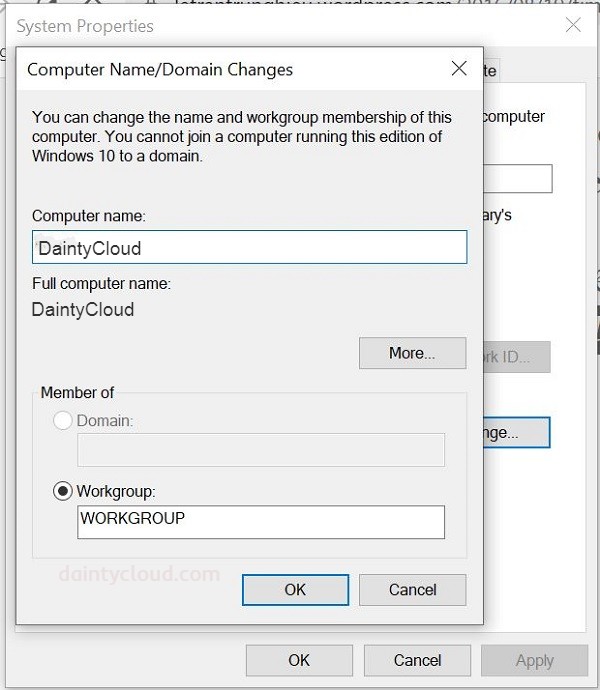
Here you will see the hostname is “Full computer name”. To change the hostname information, click “Change“. Then enter the name you want to change into the “Computer name” box.
Step 3. Restart your VPS.
Thus, with only three steps to change the hostname on a Windows VPS. Of course, it is not necessary to change the hostname. If you don’t own a VPS yet, visit Dainty Cloud right away!


Related News


What is Anti DDoS? Anti-DDoS methods