How to manage multiple Windows VPS (RDP)? Is there an easier way to manage multiple Windows VPS? With Remote Desktop Connection Manager software, that becomes extremely simple. Let Dainty Cloud find the answer in this article.
What is Remote Desktop Manager Connection?
Remote Desktop Manager is a remote VPS management solution for Windows users. This software is considered the first choice in VPS management. When using, you will easily control one or more remote VPS. This software has features such as:
Centrally manage and connect multiple Servers on a single platform.
Store all passwords and logins centrally. Or use an existing password manager, such as KeePass.
Protect your connections from various attacks and threats using access control.
Reduce the burden of managing permissions and accounts. Create templates to simplify management.
As a software of Microsoft, it is not difficult for it to enter the top of the most popular management software. So, do you know how to install and use this software? Please continue to follow the content below to know that.
Manage multiple Windows VPS more efficiently and quickly
Instructions for installing and using Remote Desktop Connection Manager
Download the software here. After downloading, proceed to install the software. The installation process is simple, no different from the usual installation methods. Once the installation is complete, launch the software.
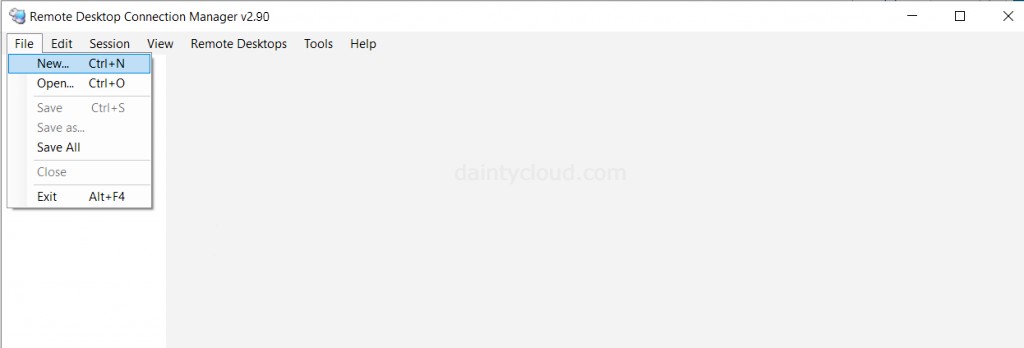
Step 2. Add VPS group to manage
The interface that appears after booting will be as shown below. Here you click File, select New (or press Ctrl+N). Name the VPS group and choose a place to host the newly created group. Creating a VPS group helps you manage multiple VPS according to the different nature of work. To simplify VPS management, each person will have a separate classification.
Start management by creating a VPS group
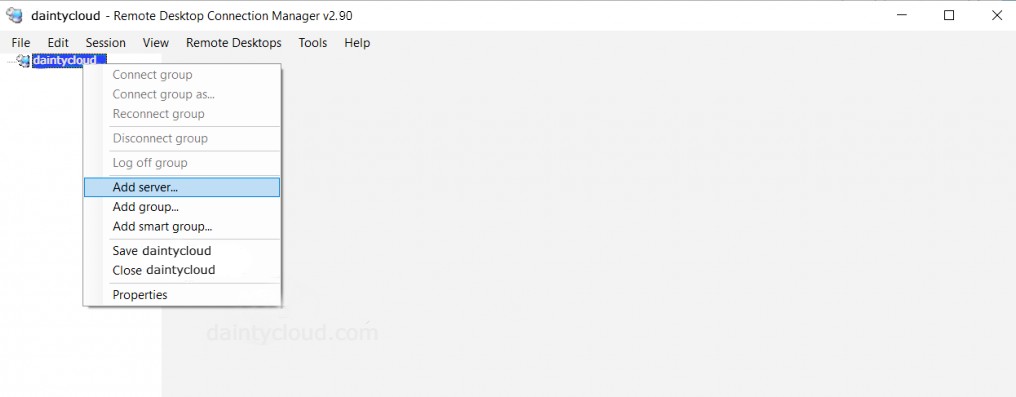
Step 3. Add VPSs to the created group
Right-click on the group you want to add the VPS. Then select Add Server to add VPS.
Right-click on Add server to add VPS
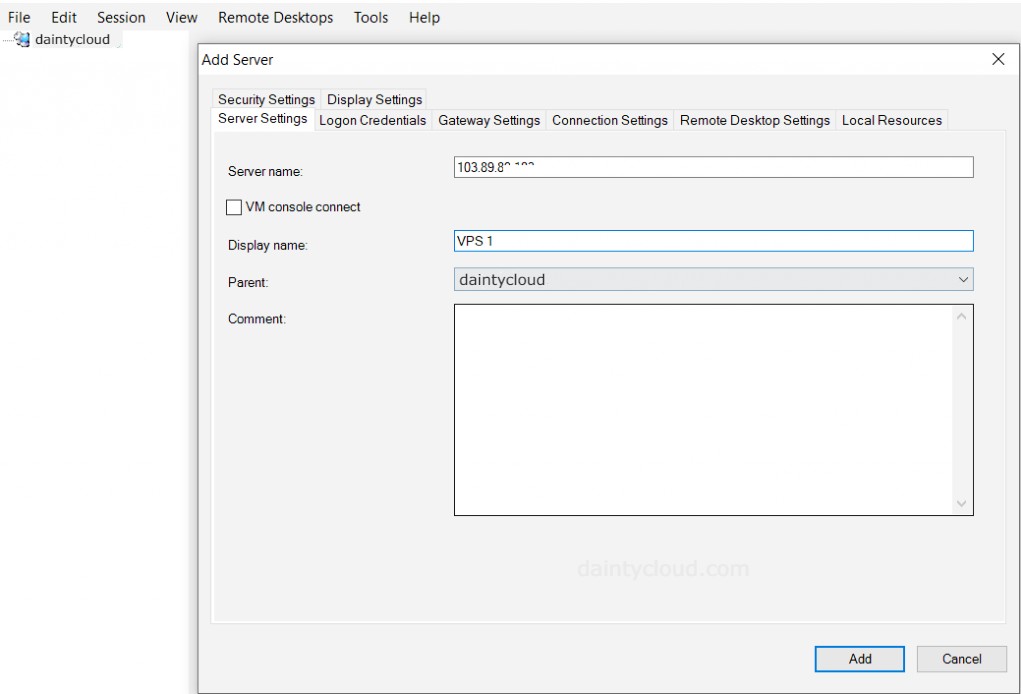
Next, a window will pop up with a lot of items. But you only need to pay attention to some of the following items.
Server name: here, you enter the VPS IP.
Display name: you set the display name for VPS on the management screen. You can name it whatever you want or just let it follow the IP it chose. Here, for example, the display name is VPS 1.
Enter the IP and display name of the VPS here
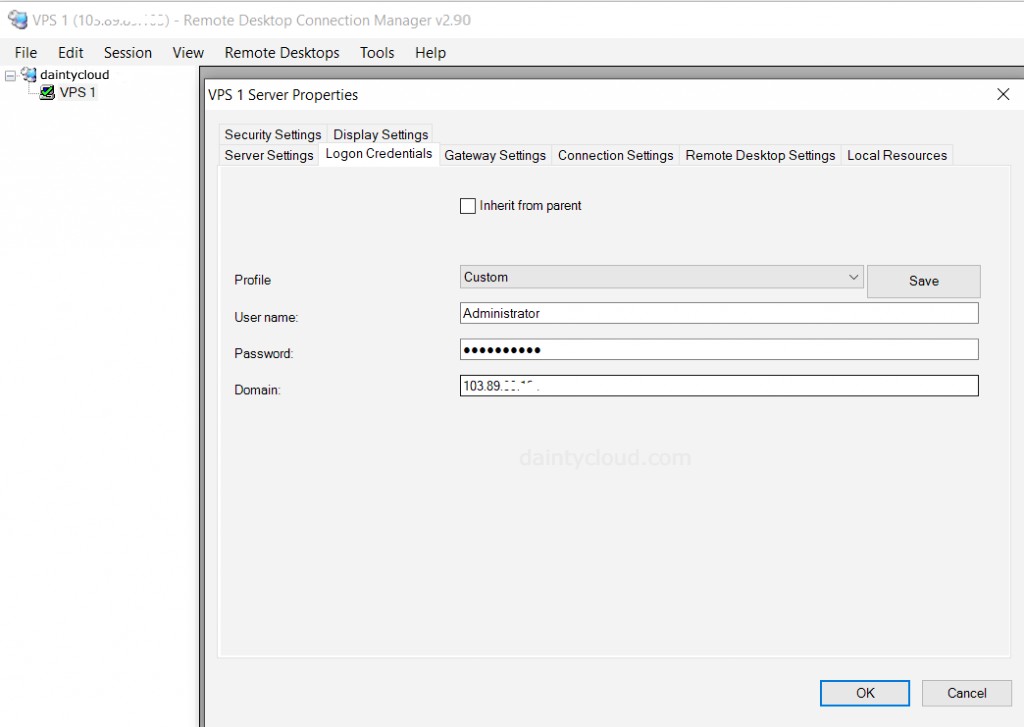
Next, switch to the Tab named Logon Credentials and fill in some information as follows:
Uncheck the Inherit from parent line.
Username box: fill Administrator (you can use another VPS username). Usually, Administrator is the highest administrative right of the Windows VPS.
Domain: enter your VPS IP here.
The VPS will be added to the group successfully after you click OK. The connection of VPSs will also take place immediately. If you want to adjust other parameters, you can refer to the remaining Tabs.
Perform the final tasks at the Logon Credentials tab
Step 4. Start VPS Management
To connect and manage, you use to double-click on VPS in the VPS list of the group. Then the system will automatically connect to the VPS you choose. The appearance of a blue checkmark is a notification of a successful connection. When you want to disconnect a VPS, right-click and select Disconnect Server.
So simple and convenient. If you are looking for effective VPS management software, you cannot ignore this software. In addition, you can also refer to other software at the Top 5 most effective VPS management software. Try it out on the VPS rented at Dainty Cloud, and just let us know what you think.
What is network port? For network administrators, the concept of network port is not too strange. To explain simply, the network port is the port to the computer, all activities...
You are using a Linux VPS via SSH, sometimes you are running a process on the server and it takes a lot of time, or sometimes the command is running...