Live Streaming Software: OBS Studio – The Most Effective Free Solution Today

OBS Studio is one of the most popular tools for live streaming and screen recording in the world. With its superior features and high customizability, OBS Studio has become an essential tool for anyone wanting to share high-quality online content. In this article, we will explore live streaming software: OBS Studio, its standout features, and how to use it effectively.
What is OBS Studio?
OBS Studio (Open Broadcaster Software) is a free, open-source software designed for live streaming and video recording. Launched in 2012, OBS Studio quickly gained traction in the video recording and live streaming market due to its user-friendly interface, extensive plugin system, and seamless integration with other platforms.
Key Features of OBS Studio
- Free and Open-Source: OBS Studio is completely free and maintained by the open-source community.
- Screen Recording and Live Streaming: It allows you to record your screen, webcam, and other video sources in high quality.
- Cross-Platform Compatibility: OBS Studio supports Windows, macOS, and Linux.
- Integration with Multiple Platforms: Stream directly to platforms like YouTube, Facebook, Twitch, TikTok, and more.
- Rich Plugin System: Users can install and customize plugins to enhance functionality.
Why Use OBS Studio?

1. High-Quality Video
OBS Studio offers high-resolution options, including 4K video, ensuring your content looks professional and meets the highest standards.
2. User-Friendly Interface
With its intuitive interface, OBS Studio allows users to quickly select and configure options tailored to their needs.
3. High Customizability
Live streaming software: OBS Studio lets you create multiple scenes, combining sources like webcams, screens, text, images, and video clips.
4. Versatile File Format Support
You can save videos in various formats like MP4, MKV, and FLV, providing flexibility for sharing content.
5. Large Support Community
As an open-source software, OBS Studio has a large community, making it easy to find guides, FAQs, and customized plugins.
Using OBS Studio on VPS: Benefits and Applications
Live streaming software: OBS Studio can be installed and run on a Virtual Private Server (VPS) for professional live streaming with high performance. Here are reasons to consider using OBS Studio on a VPS:
1. Stable Performance
VPS offers powerful hardware and high bandwidth, ensuring stable live streaming even if your personal computer isn’t strong enough.
2. Remote Access
Control Live streaming software: OBS Studio on a VPS from anywhere using remote management tools, making stream management more flexible.
3. Reduced Load on Personal Devices
Running OBS Studio on a VPS reduces the strain on your personal computer, allowing you to focus on content creation.
4. Scalability
With a VPS, you can easily upgrade resources like CPU, RAM, and bandwidth to handle higher-quality streaming or recording needs.
Guide to Installing and Using OBS Studio on VPS
1. Choose the Right VPS
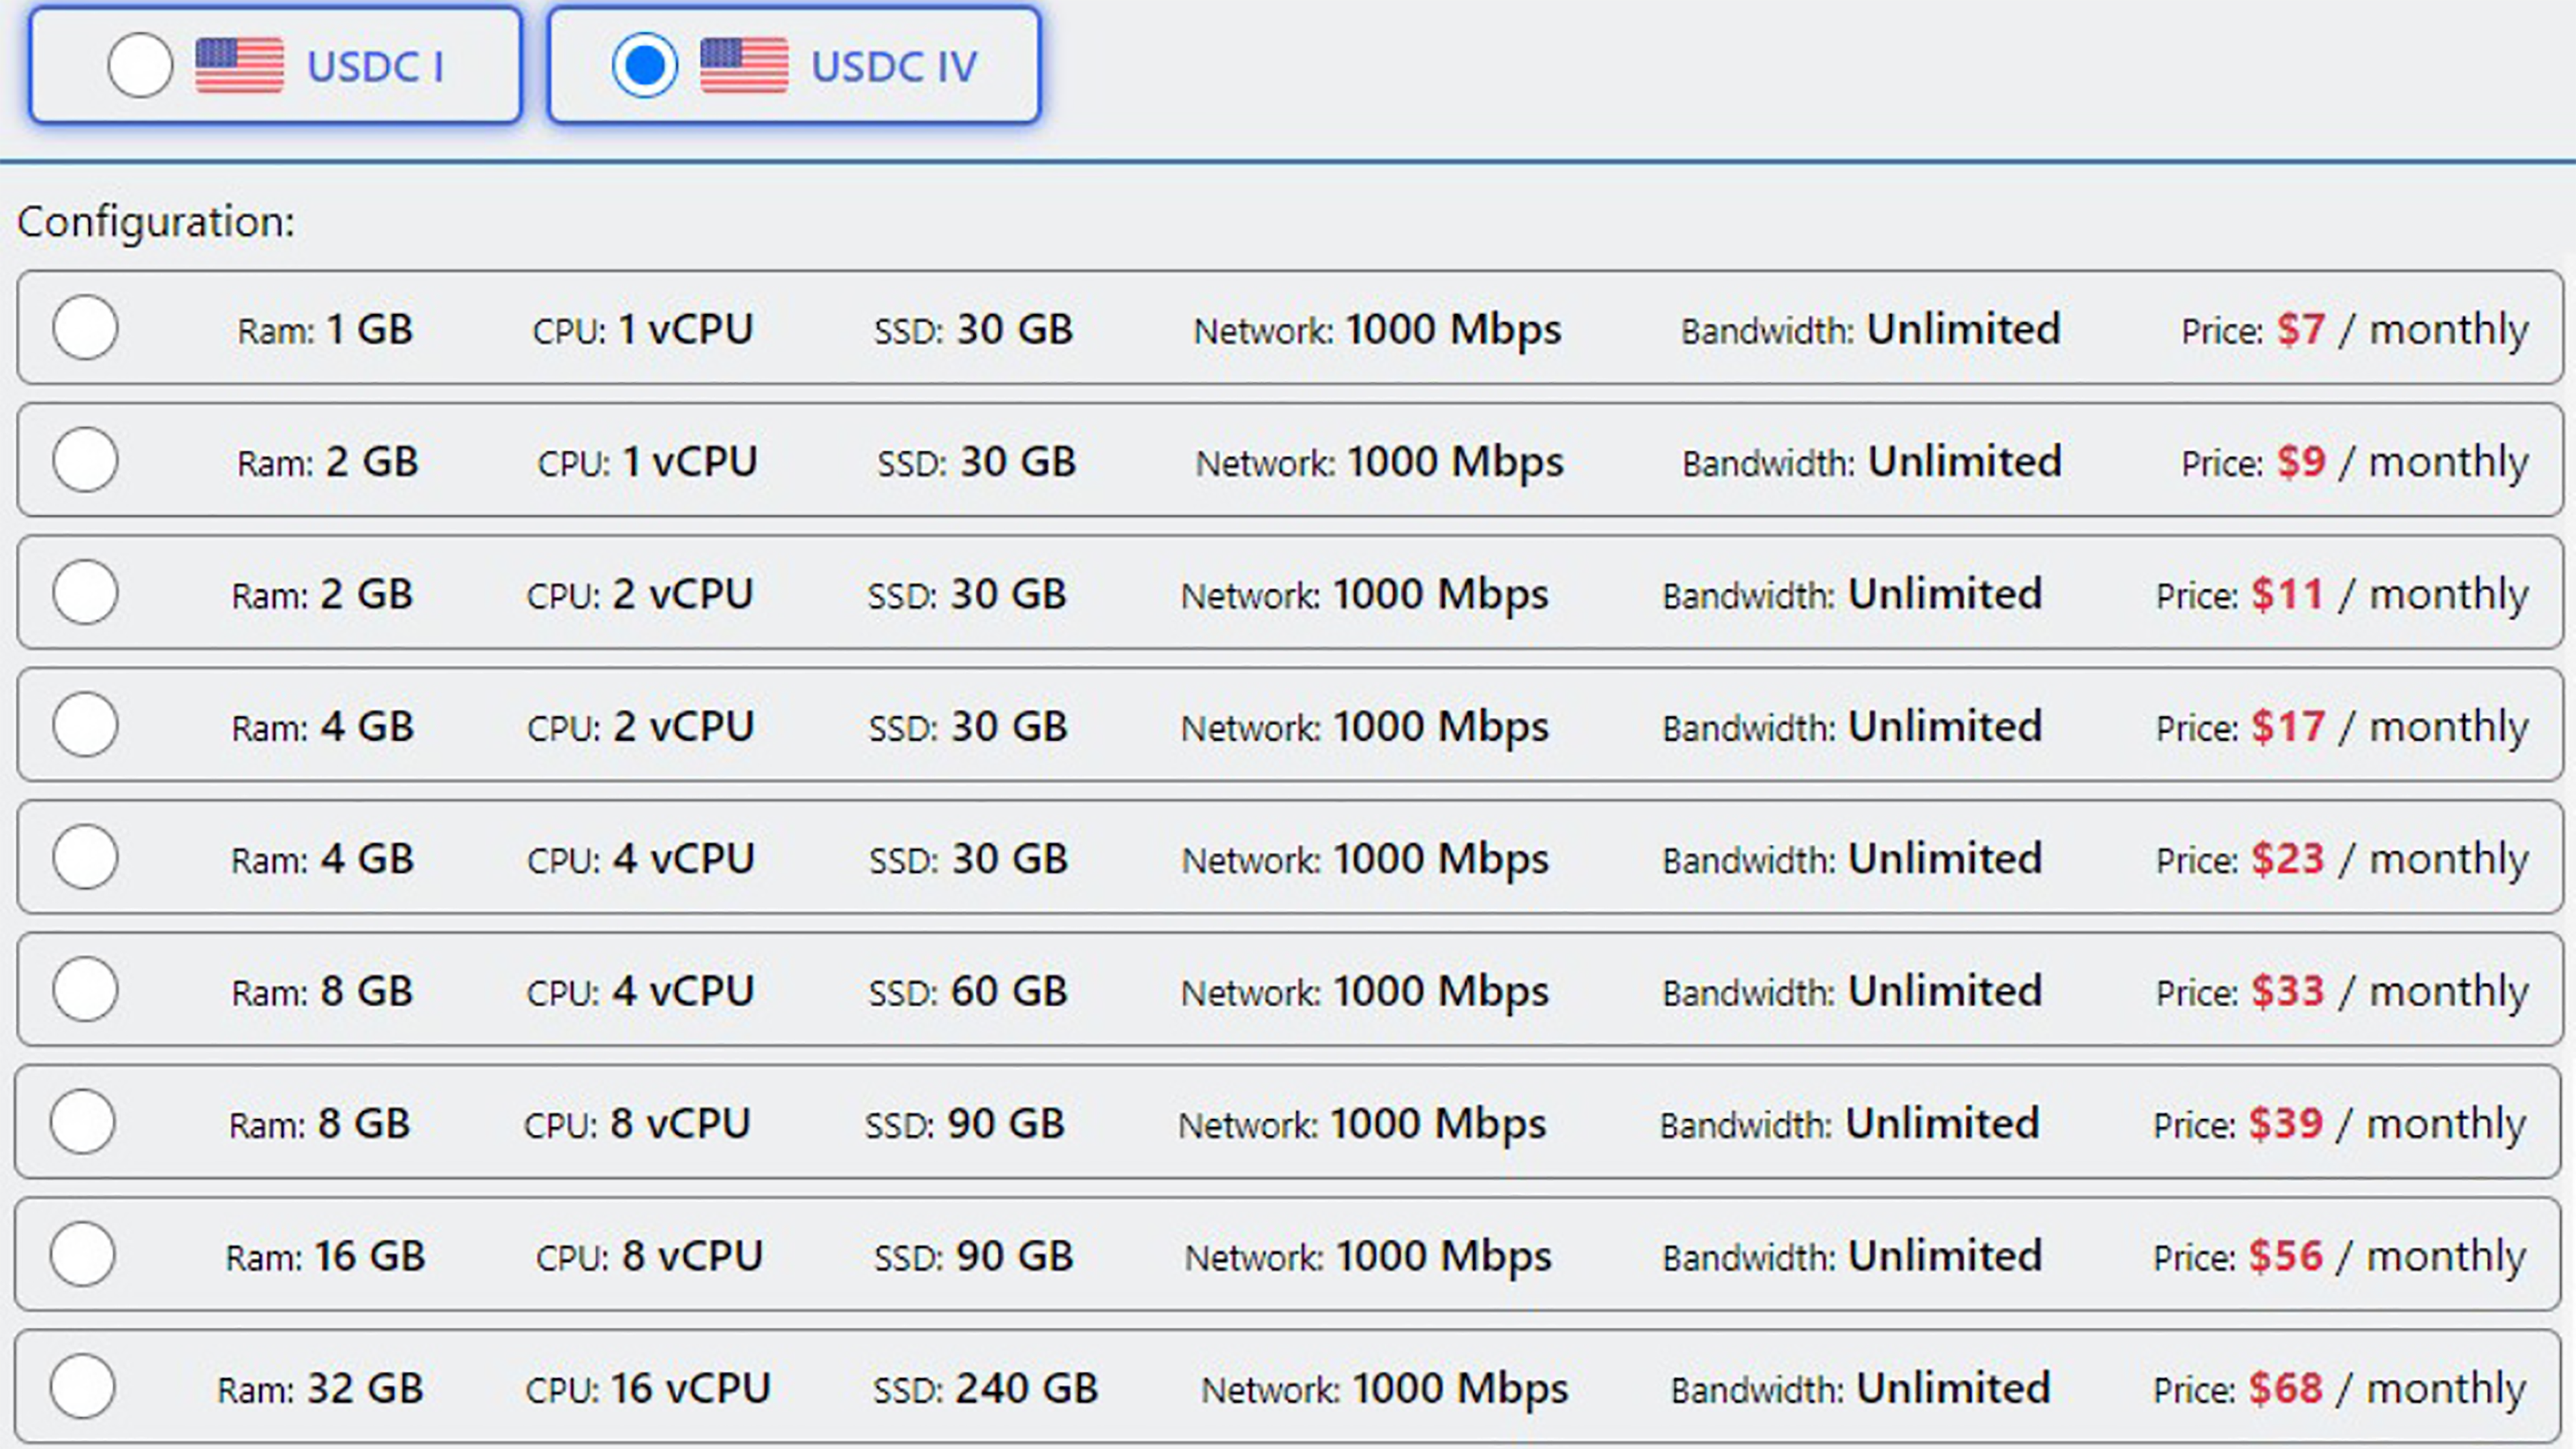
- VPS Configuration: Ensure your VPS has sufficient resources (4GB RAM, 4-core CPU or higher) for smooth OBS Studio performance.

Some USA vps packages are provided by daintycloud.com
- Operating System: The VPS should run a compatible OS, such as Windows Server or a Linux distribution like Ubuntu or CentOS.
2. Download and Install Live Streaming Software: OBS Studio
- Visit the official OBS Studio website at https://obsproject.com/
- Select the version compatible with your operating system (Windows, macOS, or Linux).

- Follow the on-screen instructions to complete the installation.


3. Configure Live Streaming Software: OBS Studio
- Open OBS Studio and use the Auto-Configuration Wizard for initial setup.
- Select your primary purpose (live streaming or video recording).

- Link OBS Studio to your account on platforms like YouTube, Twitch, or Facebook.

For example in this article, I use stream key on Facebook live to connect to obs studio.
4. Create Scenes and Sources
- Scene: Add a new scene by clicking the “+” button in the Scenes section.

- Source: Add sources such as screens, webcams, text, or video clips.

5. Start Recording or Streaming
- Click Start Recording to record video or Start Streaming to begin live streaming.

- Manage your content in real-time via the OBS Studio interface.
Tips for Optimizing OBS Studio
- Use Shortcuts: Set up hotkeys to switch scenes and perform quick actions.
- Preview Before Streaming: Use the Preview mode to ensure everything is ready.
- Reduce CPU Load: Lower bitrate or resolution in video settings if you experience lag.
Conclusion
Live streaming software: OBS Studio is an indispensable tool for anyone looking to record videos or live stream with high quality. With its powerful features and flexible customization, OBS Studio not only helps you create professional content but also saves costs. Download and explore OBS Studio today to unlock its unlimited potential!
If you want to take your live streaming or video recording experience to the next level, consider using a VPS from DaintyCloud. Our high-performance VPS hosting offers the stability, remote access, and scalability you need for seamless streaming. Visit our website today and choose the best VPS plan that fits your requirements!


