Instructions for transfer data from PC to VPS Windows and vice versa

When using a Windows VPS, you will need to upload data to the VPS or download data to your computer from the VPS. The article below will help you how to transfer data from PC to VPS Windows and vice versa, fastest and most convenient through Remote Desktop Connection
Instructions for transfer data from PC to VPS Windows and vice versa
Sharing and copying data between PC and VPS includes two ways:
– Method 1: Copy/paste directly between PC and VPS
– Method 2: Connect online (mount) the PC hard drive containing the files to be processed with the VPS.
-
Method 1: Copy/paste directly between PC and VPS
In this way, copying data from a PC to a VPS or copying files from a VPS to a PC is done directly, similar to copying files between folders or drives on a regular PC.
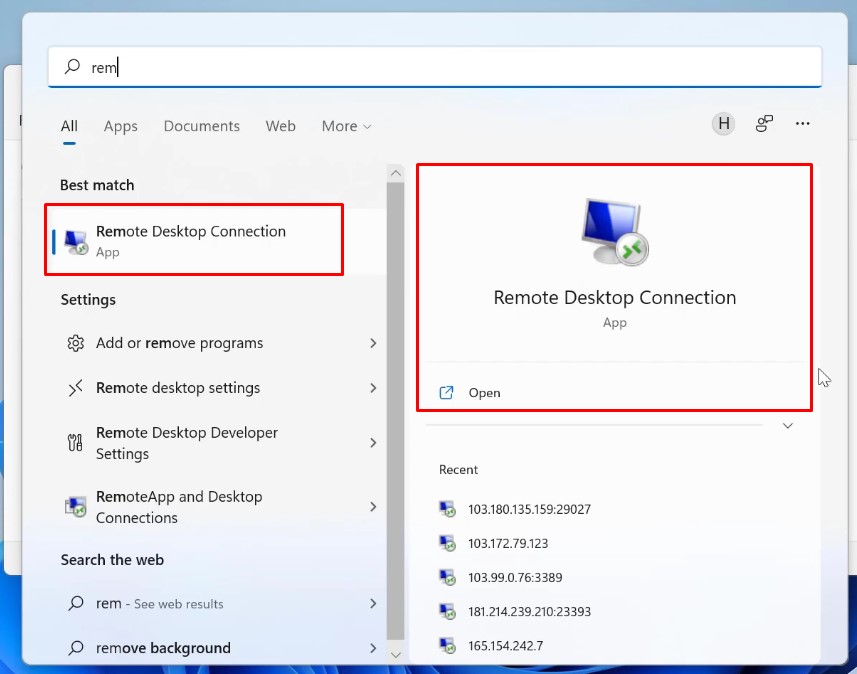
- Open Remote Desktop Connection from the search bar on your computer.

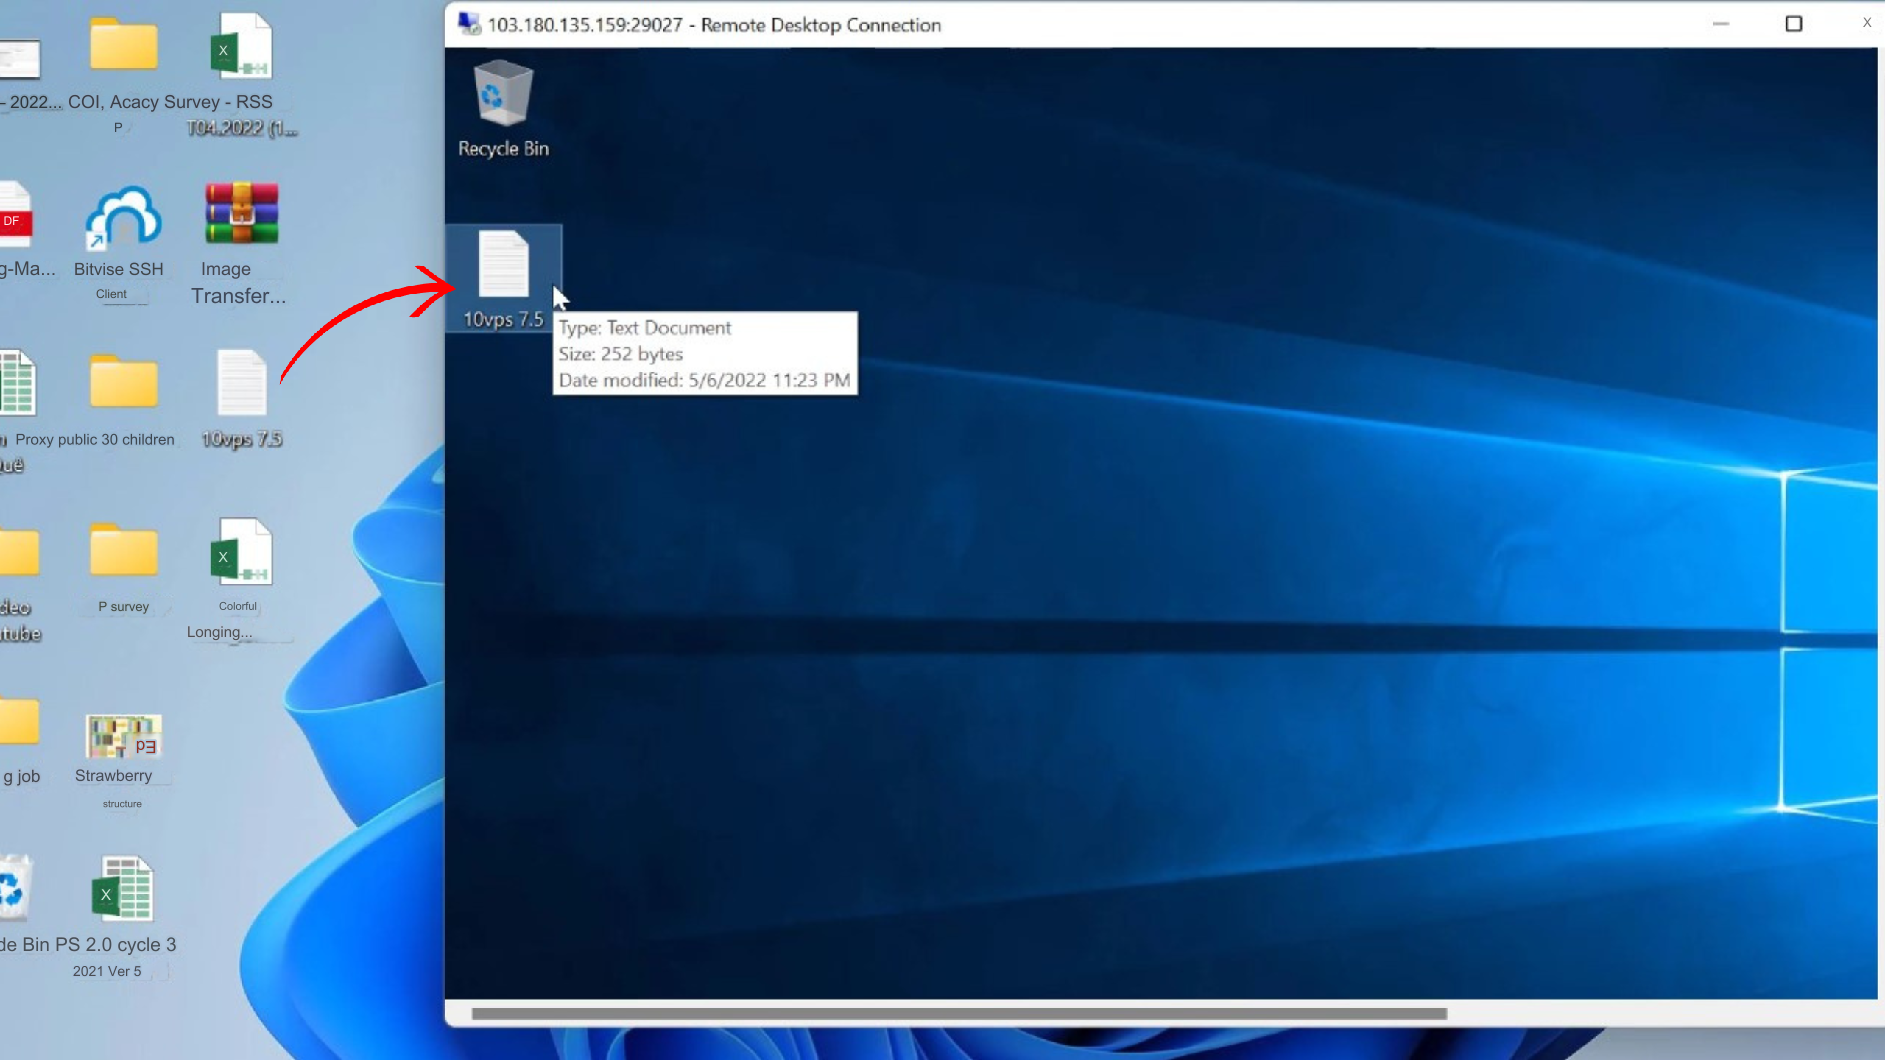
2. Log in to VPS, at this time the VPS is displayed in full screen mode, we need to minimize the VPS interface into a window so we can easily copy files.
3. Copy the file on the PC and paste it on the VPS window to share data from the PC to the VPS and do the opposite to copy files from the VPS to the computer.

-
Method 2: Connect (mount) the PC hard drive to the VPS
- Log in to VPS, in the initial interface, after entering the IP, do the following:
- Select “Show Options”

3. Select the “Local Resources” tab -> select “More”

4. Here, click Drives, then tick the drives containing the files you want to upload to the VPS -> OK

5. Continue logging into VPS as usual. Then go to File Explorer and you will see your PC’s drive has successfully linked to the VPS. You can copy data from PC to VPS or vice versa like with a regular drive.


-
Things to note when transfer data from PC to VPS Windows and vice versa
-
Check network connection
Copy and file transfer speed may depend on network connection and file capacity. Make sure that the network connection is stable and has enough capacity to copy data conveniently and quickly. An unstable network connection can cause copying errors or data loss.
2. Check access rights:
Make sure you have enough access and editing rights to the folders or drives that need to copy data. On both the computer and VPS, reset access and security permissions if necessary to ensure that you have permission to access and perform data replication operations.
3. Size and number of files
If you copy a large number of files or large files, please note that the copying process may take time and consume network resources. Make sure you have enough space and resources needed on both your computer and VPS to process data.
4. Check files after copying
After completing the copying process, check the copied files to ensure integrity and no errors. Compare the size and content of files on both the computer and the VPS to ensure that the copy process was successful and no data was lost or corrupted.
5. Back up important data
Before performing any copy operation, make sure to back up important data. This helps ensure that you have a backup copy of your data in case something goes wrong during the copy process or unexpected data loss occurs.
6. Be careful when deleting data:
When copying data from a computer to a VPS or vice versa, be careful when deleting data from the computer or VPS after successful copying. Make sure you delete the correct copies and do not accidentally delete the original data on your computer or VPS.
7. Monitor progress
Monitor the progress of data copying to ensure that no errors occur and the process goes smoothly. This helps you catch any problems or errors that may occur and can fix them promptly. Following the above instructions will help you copy data between your computer and VPS safely, effectively and successfully.
You can register for free and use Windows VPS at DaintyCloud.com.

