Install .NET Framework 3.5 on a Windows VPS
In using VPS, sometimes not installing software makes users uncomfortable. To resolve this situation, you need to install .NET Framework 3.5 on a Windows VPS. So what is .NET Framework 3.5? How to install? Don’t miss the article below by Dainty Cloud to get the answer.
Why install .NET Framework 3.5?
When renting and using a VPS, some customers may encounter an error that they cannot install software on it. The reason is due to the lack of a .Net Framework 3.5 environment. It prevents you from running the software you want. Programs written in the .NET language need the .NET Framework environment to be installed and run.
The cause of the .NET Framework environment not appearing on your VPS can be due to:
- Turn off Windows Update.
- Your VPS already has .NET Framework but is not enabled.
- Framework error.
- You tried to install .NET Framework 3.5 automatically in Roles but failed for some reason.
No one wants to encounter difficulties in exploiting the benefits of VPS. Let’s install .NET Framework 3.5 following the steps below.
Instructions for installing .NET Framework 3.5
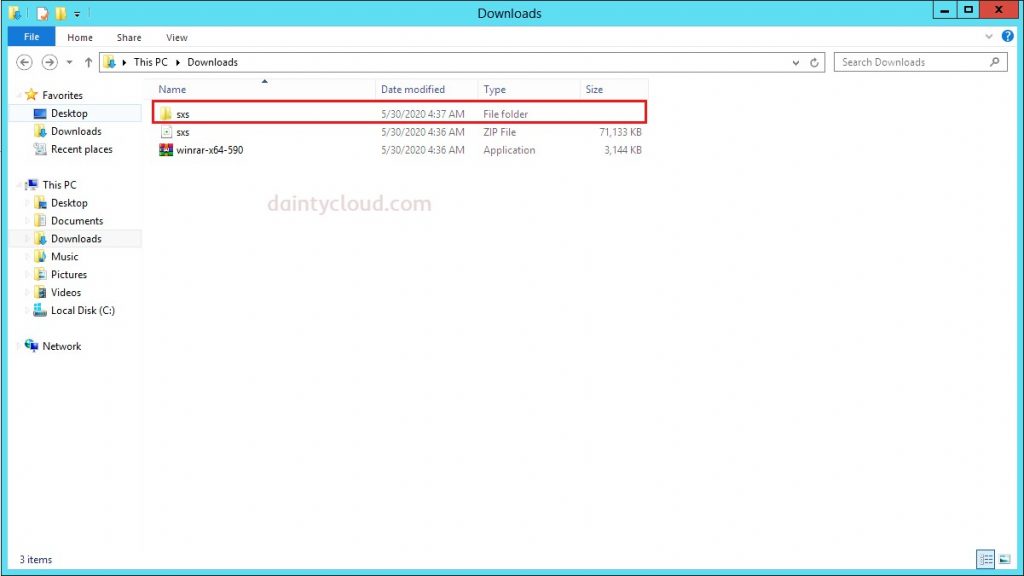
Step 1. First, we need to download the .NET Framework 3.5 installation package. Download Link: Here. After downloading, you need to extract the zip file.
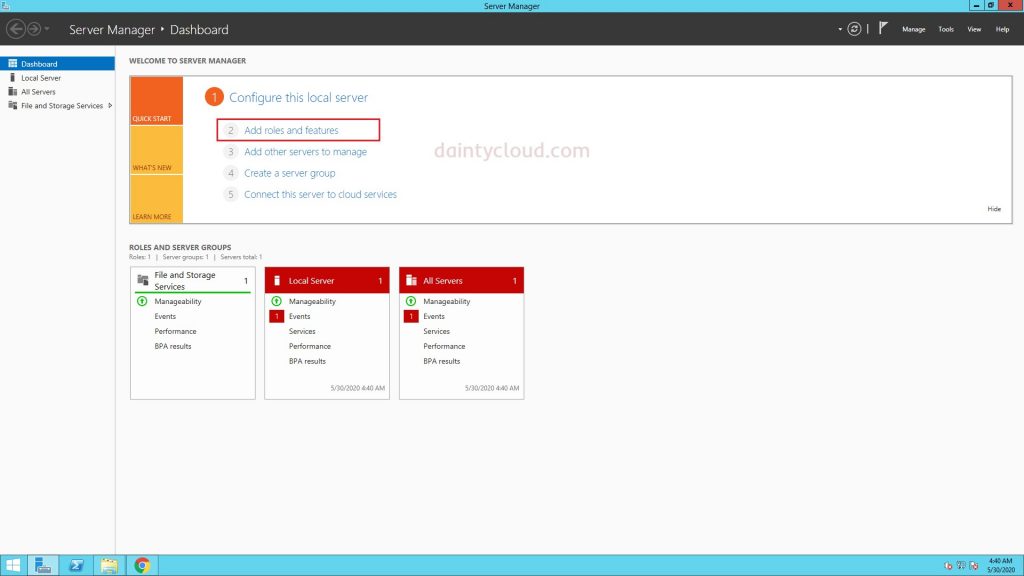
Step 2. Go to Server Manager and select Add roles and features.
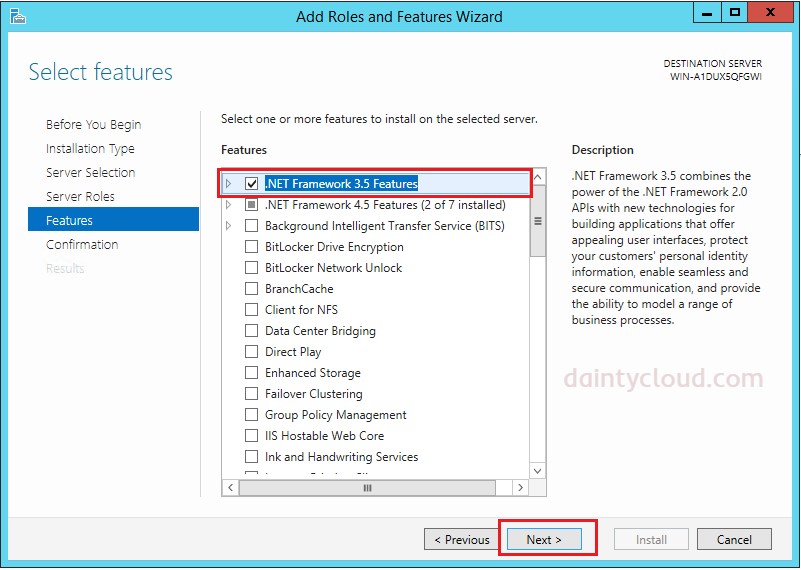
Step 3. Continue clicking Next until the screen below appears. Then you select .NET Framework 3.5 Features. Then select Next.
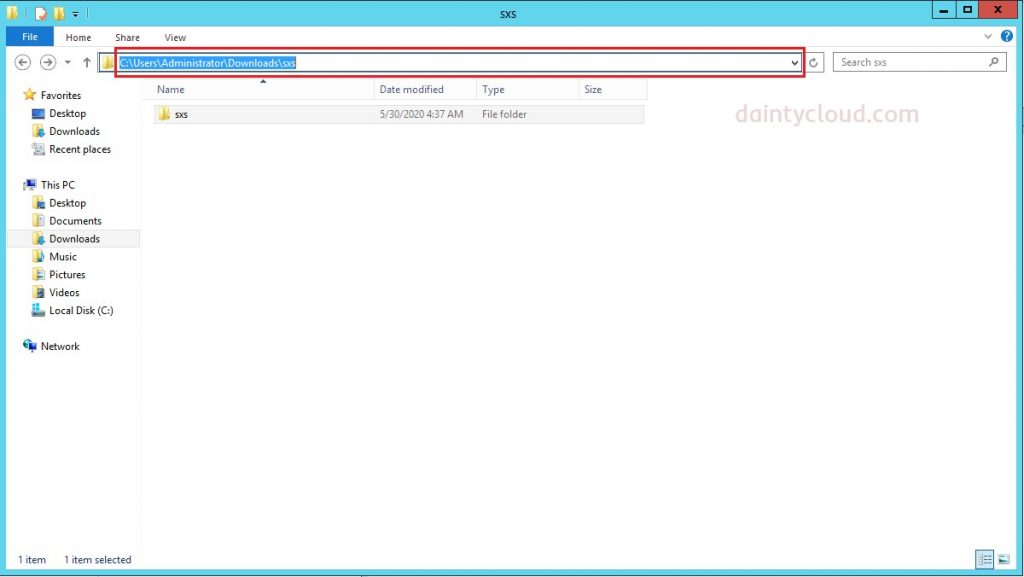
Step 4. You go to the file you just downloaded in Step 1 to get the file path. Copy the file path again to perform Step 5.
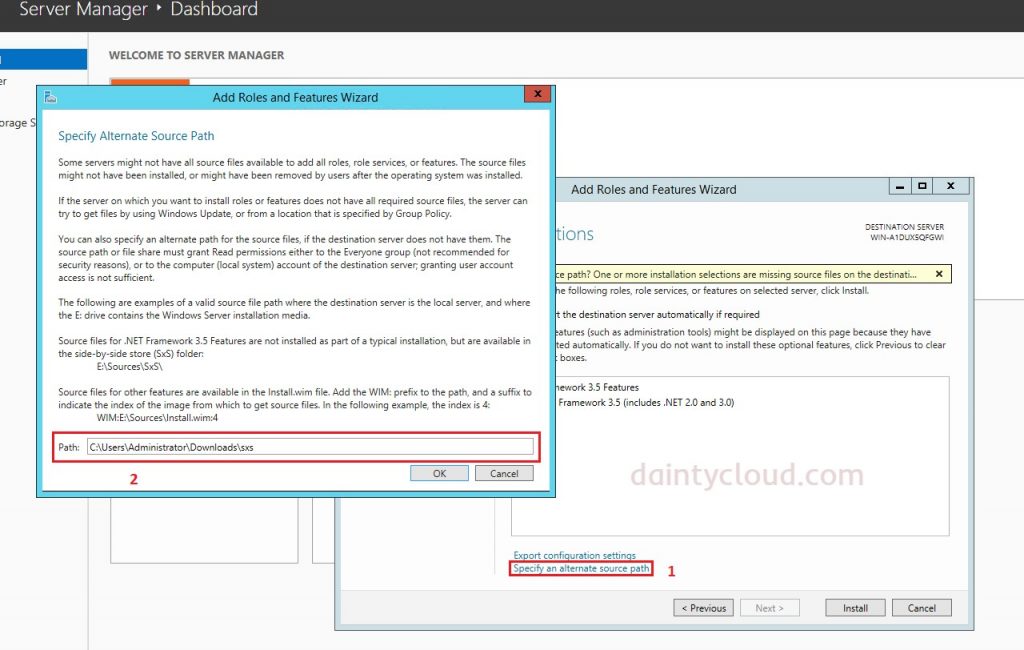
Step 5. Back to Step 3, click Specify an alternate source path. Then paste the copied path link into Path. Select OK and Install.
Finally, you wait for it to finish running and then Reset the VPS.
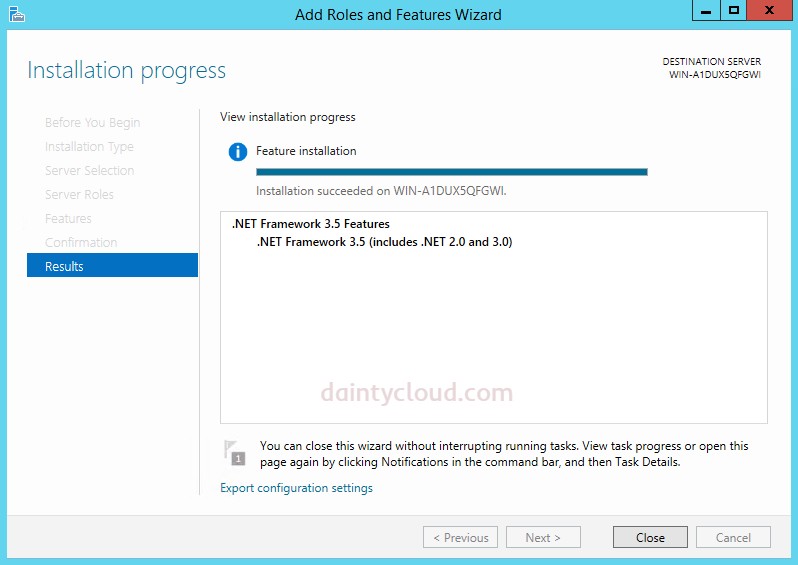
So just a few simple steps, you can successfully install .Net Framework 3.5 on a Windows VPS. Any comments, please send them to Dainty Cloud’s contact channels.

